


THE BASICS
Join an event
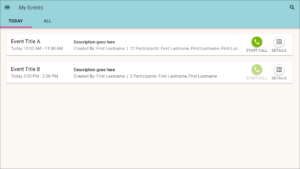
From  My Events, say the title of the event you’d like to join and say “Start Call”.
You can choose whether or not you want the video and microphone turned on before you enter the meeting in the preview window.
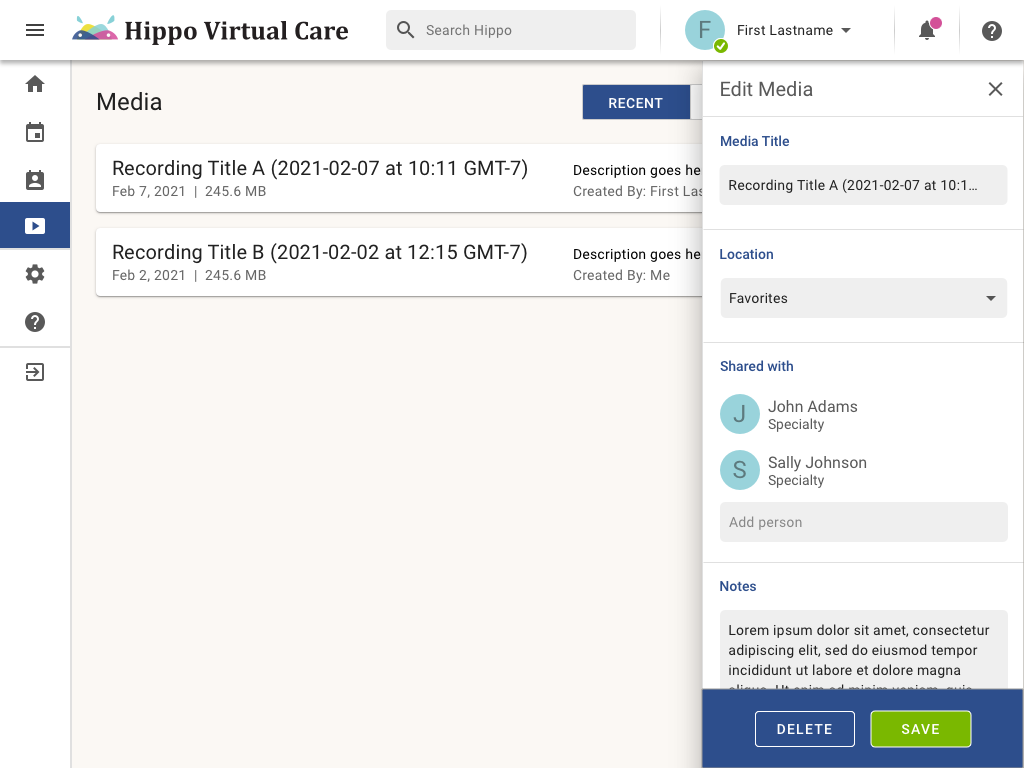
From the event details, you can view the participants and notes regarding the event. You can modify an event from the Hippo Virtual Care Client Portal.


Make a Recording
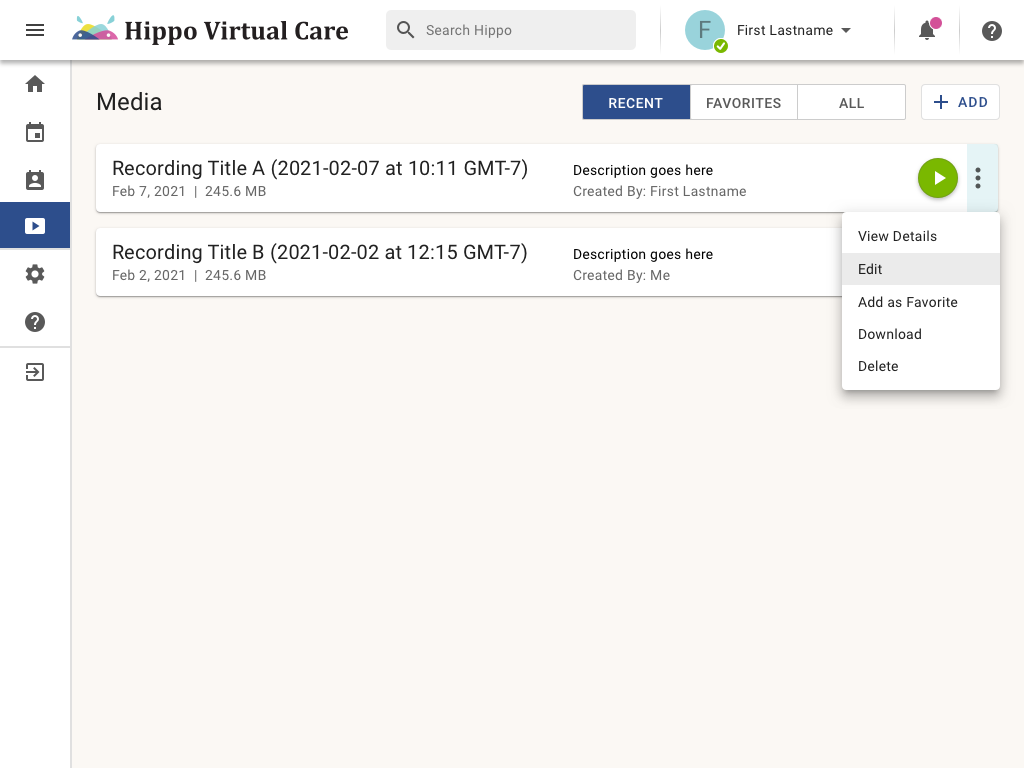
You can create both synchronous and asynchronous recordings to share with Hippo Virtual Care. Media files stored on the Hippo Virtual Care Cloud are secure and HIPAA compliant.
Synchronous Recordings
- During a scheduled meeting, say, “Record.“
- Gather consent from all participants and say, “Start,” to begin recording.
- When the meeting has ended, say, “Stop.“
- A verification message will display. Say, “Stop.“
- Saying, “Share,” will automatically give access to the recording to all licensed participants.
The meeting recording will be automatically saved to the Hippo Virtual Care Portal under My Media. Typically there is a delay before the recording is available.
Asynchronous Recordings
Pre-recorded videos allow team members to consume content conveniently, making them ideal for training and educational purposes.
- To start an asynchronous recording, say, “Record Now.“
- Adjust your audio on the preview screen, then say, “Start Recording.“
- When finished recording, say, “Stop Recording.“
The recording will be automatically saved to the Hippo Care Virtual Portal under My Media when connected to WiFi.

Start a chat
From  My Contacts, you can chat with one or more individuals. State the contact’s name and say, “Chat.” Dictate your message and say “Send.”
To place a call to multiple individuals, say “Select” followed by each contact’s name. After all the participants have been selected, say, “Chat.”

The first step is to charge your headset fully. First, locate the charging port under the cover and insert the USB-C cable. Then plug the cable into the power adapter and the adapter into a power outlet. The power button will blink red while charging and turn green when fully charged.
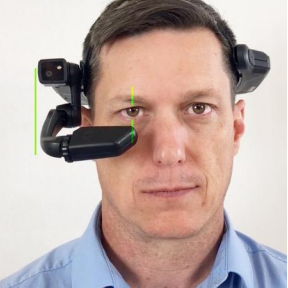
Placing the display pod in front of your dominant eye will provide a more accurate preview and better visual information processing.
- To determine your eye dominance, extend your arms out in front of you with palms facing away. Bring your hands together to form a small triangle with your thumbs and forefingers.
- With both eyes open, center a distant object within the triangle — such as a picture or clock. While maintaining focus on the object, close your left eye. If the item stays centered, you’re right-eye dominant, and you should place the display pod on the right side.
- If your hands no longer frame the object, you are left-eye dominant, and you should place the display pod on the left side.
If the object remains centered regardless of the eye you close, you are dominant eye neutral and can use either side.

The workband can be easily adjusted, and the tall clips securely attach to the headset for additional device stability.
- Place the workband on your head with the logo facing forward and clips on the outside.
- Using the velcro strap, adjust the fit like a baseball cap.
- Take the workband off and hold it with the wide end of the band in the front.
- Fully extend the display arm of the HMT-1 5. Using the notches on the outer edge of the HMT-1, snap the workband onto the headset starting with the smaller clip.
Start by positioning the display pod on your dominant eye side and bend the boom so it forms a slight “Z” shape. Place the device on your head so that it is horizontal with the ground and positioned above your ears, along your temple area.
The power button is the round silver button on the headset above your ear. Press and hold down the button for about three seconds, then release. You will hear a sound in about ten seconds as the start-up sequence completes and the screen activates.
Fine-tune the position of the display pod until you can see the entire HMT-1 home screen.
Download and install the RealWear Companion app on an iOS or Android device from the App Store or Google Play Store.
On the HMT-1, say, “My Programs. Settings. Network. Internet. Wireless Networks;’ then say the name of the wireless network you wish to join.
On the RealWear Companion app on the mobile device, click Remote Keyboard.
At the bottom, type in the password to the network and click Done.
Back on the HMT-1, say ” Scan Code.”
Hold the mobile device in front of the HMT-1 camera so it can scan the code.
Once you hear the chime, say “Connect.”
Say “Navigate Home” and verify that the Wi-Fi network name displays at the bottom of the screen.
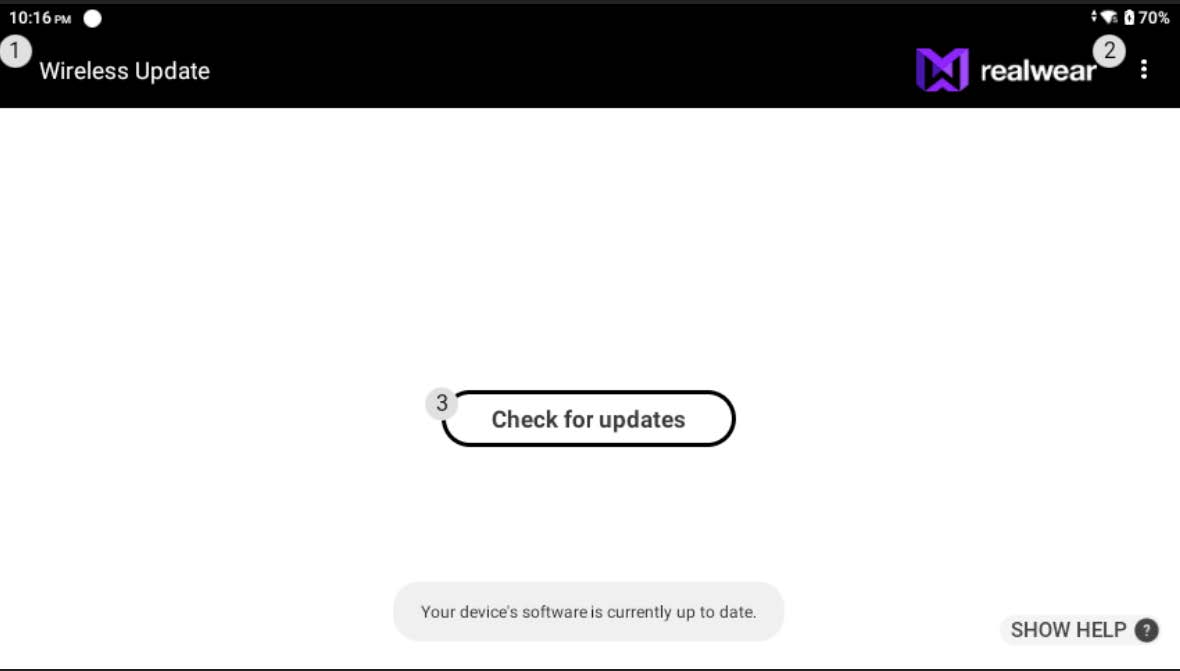
Image for reference only.Power on the headset and ensure you are connected to Wi-Fi.
Charge the headset to at least 30%. Leave the headset plugged into power during the update process, as if the headset drops below 30% at any time, the update will stop.
Say “My Programs. Wireless Update.”
Wait a few seconds for the device to fetch the update.
Say “Download” to start downloading.
Once it shows 100%, say, “Install Now. Okay.”
Once the device powers back on repeat step #3 until there is no longer a download button. The download button will be replaced by a Check for Updates button.
After this step, if there are display issues with RealWear Explorer, fix them by disconnecting and reconnecting the device to the computer via the USB cable.
- From the home screen, say, “My Programs. Settings. Page Down. Page Down. System. Date and Time.”
- Ensure that the Use Network Provided time toggle switch is enabled. If it’s not turned on, turn it on by saying, “Use network provided time. Time zone.”
- The Region and Time zone are set to the address it was shipped to.
- If the region is accurate, say “Time zone,” then “Page up,” or “Page down,” to scroll through the available time zones in the region. Say the name of the appropriate region. (Ex. “Los Angeles”).
- If the region is inaccurate, say “Region,” and enter the name of your country. Say “Submit,” to close the keyboard. Say the name of the appropriate region. Scroll through the available time zones in the region by saying “Page up,” or “Page down,” and select one by saying it (Ex. “Los Angeles”).
- If the HVC App is an older version (before Nov 1, 2021), please uninstall it.
To update to a newer version of Hippo Virtual Care onto your HMT-1, you will need to uninstall any version(s) (pre 11/1/21) you might have currently installed on the headset.
- Navigate to My Programs > Settings > Apps and Notifications > See all # apps.
- Page down until you locate the Hippo application.
- Say the application name and then say, “Uninstall. OK.”
- Ensure the device is connected to the internet.
- Say “Recent Applications. Dismiss All.”
- Hold down the power button for 5 seconds until the device powers down.
- Hold down the power button for 5 seconds until the device powers on.
- Wait 5 minutes for the download to be complete.
You can navigate and interact with your Hippo HMT-1 using your voice. Voice commands display as text in all caps. The following are global commands that work across all applications.
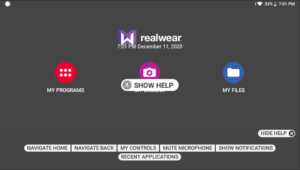
Navigate home will return you to the device home screen.
Navigate back will take you to the previous screen.
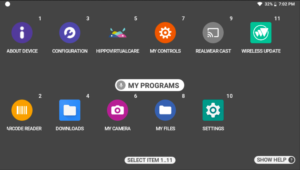
My programs navigate you to your programs folder, where you can launch Hippo Virtual Care.
My controls display the controls panel.
Show help will provide information on the commands associated with that particular screen.
The HMT-1 Home Screen is the dashboard for the headset and the default screen when you power on the HMT-1. Voice commands control the Hippo HMT-1 headset. To launch Hippo Virtual Care, say “My Programs,” then say “Hippo Virtual Care.”
The quickest way to log into Hippo Virtual Care from your headset is to scan the QR code provided in your welcome packet.
From the Hippo HMT-1 Log in screen, say, “Scan QR code,” and point the camera at the QR code. To enter your PIN say “Numbers” and speak the words displayed beneath each number. These words are dynamically generated to protect your unique PIN.
You can reset your PIN from the Hippo Virtual Care Client Portal.

From My Events, say the title of the event you’d like to join and say “Start Call”.
You can choose whether or not you want the video and microphone turned on before you enter the meeting in the preview window.
From the event details, you can view the participants and notes regarding the event. You can modify an event from the Hippo Virtual Care Client Portal.
You can quickly get in touch with a contact directly from their card. State the contact’s name and say, “Call.”
To place a call to multiple individuals, say “Select” followed by each contact’s name (i.e. “Select John Smith, select Amy Jones, etc.). After all the participants have been selected, say, “Start Call.”
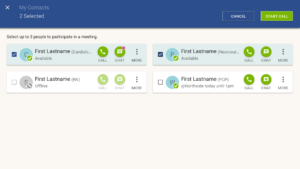
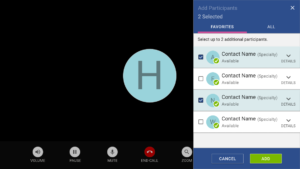
To invite others during a meeting, say “Participants” to view the participants panel. Saying “Add” will display your contacts list. Select the individuals you would like to invite by saying “Select” followed by each contact’s name. After all the new participants have been selected, say, “Add.”
From My Contacts, you can chat with one or more individuals. State the contact’s name and say, “Chat.” Dictate your message and say “Send.”
To place a call to multiple individuals, say “Select” followed by each contact’s name. After all the participants have been selected, say, “Chat.”
You will see notifications for new events, incoming calls, or chats. The actions you can take vary based on the notification type. State the action you’d like to take, such as “Accept” or “Retry.”